Installation Guide
In order to run Hazy, you need to have PostGreSQL 8.4(or higher), ocaml, gcc and g++ installed.
In order to run Hazy, gcc and g++ should have installed.
You can download PostGreSQL 8.4(or higher) from here. Some systems can have PostGreSQL default, but since Hazy uses libpq library of PostGreSQL, you need to download source code and install from scratch. After downloading, you can tune configuration parameters to obtain better performance results with Hazy. Assuming 4GM RAM (you can change parameters proportionally to RAM), the parameters in postgresql.conf can be changed as follows:
- shared buffers=896MB
- work mem=256MB
- maintenance work mem=512MB
- effective cache size=1792MB
- checkpoint segments=65536
The system might not allow shared buffer parameter to be increased since it uses more System V shared memory. In order to change this, you can edit /etc/sysctl.conf file and add these two lines, then run the command "sysctl -p". Note that, it requires root access.
- kernel.shmall=671088640
- kernel.shmmax=671088640
After that, set your LD_LIBRARY_PATH so that PostgreSQL lib directory is also included.
LD_LIBRARY_PATH=$LD_LIBRARY_PATH:POSTGRES_HOME/lib;
export $LD_LIBRARY_PATH
In order to run Hazy, you need to install ocaml. You can download it from here.
Also, after installing PostgreSQL and ocaml, you need to modify ~/.bashrc in order to add path of the binaries of PostgreSQL and ocaml. To do this: append path_to_PostGreSQL/bin:path_to_ocaml/bin to end of PATH line in your ~/.bashrc file.
You can download Hazy from this link.
download Hazy_System.tar.gz

      tar -zxvf Hazy_System.tar.gz
This will create directory "Hazy_System". Under Hazy_System, there are 2 directories: "doc" and "system_src". When you navigate to system_src, you will see hazy.conf file that contains
- POSTGRES_PATH: path to your PostGreSQL installation directory
- Database: name of the database that you want to use for Hazy
- Storage_Manager: Which storage managers you want to use. Options: Main_Memory_SM, Ondisk_SM, Hybrid_SM
- Use_Eps_Map: If Storage_Manager is Hybrid_SM, then you can set this to 1 if want to use eps map, 0 otherwise
- Hazy_Strategy: Which hazy strategy you want to use for incremental updates. Options: EAGER_HAZY, EAGER_NAIVE, LAZY_HAZY, LAZY_NAIVE
- Reservoir_Size: If you want Hazy to use reservoir during training, you can set this variable to a value > 0 (e.g. 1000).
- Buffer_Size: If Storage_Manager is Hybrid_SM, then you can determine the buffer size that you want Hazy to use. Usually, it is 1% of entity size.
Also, there will be Hazy directory that contains all source code, scripts, Makefiles and executable files.
To install Hazy, you need to have a database created in PostGreSQL. Also, Database field in hazy.conf should have this database value.
To create a database with name "hazy_demo", you can run the following command:
createdb hazy_demo.
Now, you need to modify hazy.conf file. Example hazy.conf file looks like:
POSTGRES_PATH=/scratch/koc/Programs/postgresql
.
Database=hazy_demo
Storage_Manager=Ondisk_SM
Use_Eps_Map=0
Hazy_Strategy=EAGER_HAZY
Reservoir_Size=0
Buffer_Size=0
Since we have a database, we can compile and install Hazy. You need to navigate Hazy home directory and run this command:
cd HAZY_HOME.
cd system_src/Hazy
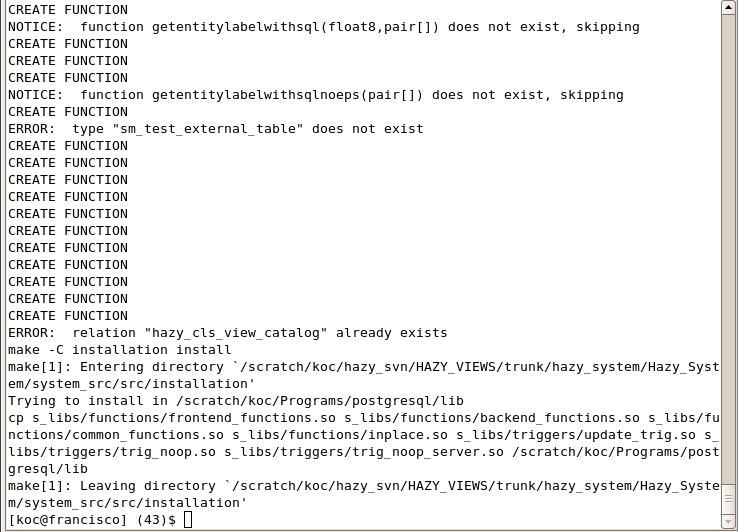
sh scripts/install.sh
This code will compile sgd, database C, SQL functions and ocaml files. Sample screenshot is as follows:
First, we need to have entities that we want to classify. You can try the example dataset that we provide.
3.1 Loading demo dataset
In order to load this dataset to the "hazy_demo" database that we just created, run the following commands:
cd HAZY_HOME/system_src/Hazy.
psql hazy_demo < demo/demo_papers.sql
Before creating the view, we always need to have hazy server running. To start hazy server, run the following command:
cd HAZY_HOME/system_src/Hazy.
./exec/hazy_main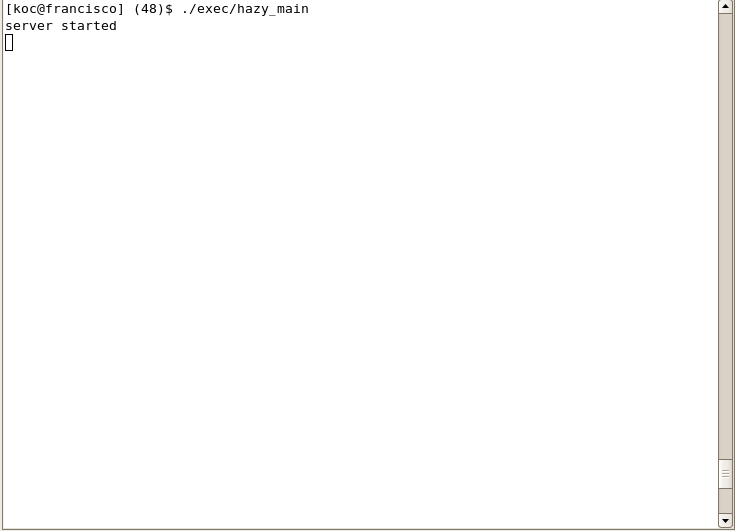
Now, we are ready to create our view. To create the view, we need a query that Hazy parses and creates the view. For this example, our query is:
CREATE CLASSIFICATION VIEW demo_labeled_papers KEY id
.
ENTITIES FROM demo_papers KEY id
LABELS FROM Paper_Area LABEL l
EXAMPLES FROM demo_training_examples KEY id LABEL l
FEATURE FUNCTION tf_bag_of_words;
This query declares a view demo_labeled_papers that contains each paper in demo_papers, but now labeled by Hazy. Name of the entity table that contains id and title of the publication is demo_papers. demo_training_examples table contains training examples to train a model by Hazy. Also, to extract the features of the publications, Hazy uses tf_bag_of_words. Paper_Area table specifies possible labels such as database paper or not.
In order to create this view by using Hazy parser, we can use the following command:
cd HAZY_HOME/system_src/Hazy.
cat demo/create_demo_view_query | ./exec/hazy_parser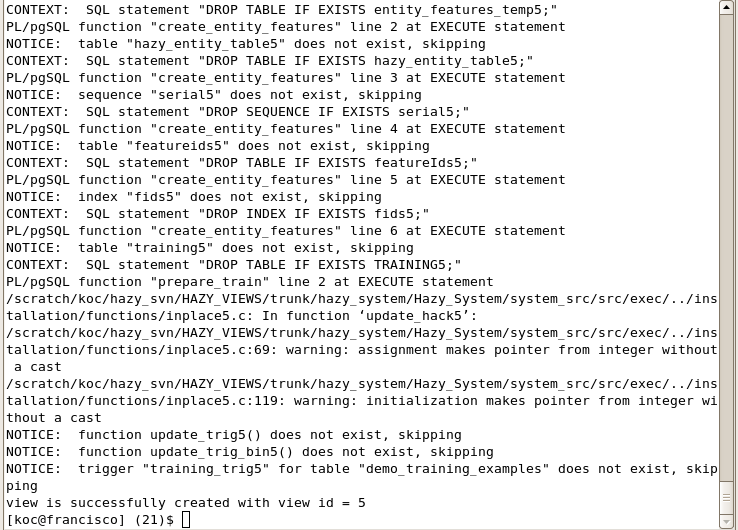
As we see from the screenshot, our view is successfully created with view id 5.
Since our view demo_labeled_papers is created in PostGreSQL, we can query it like a regular database table (Actually, since our strategy is eager, the view is a regular database table). First, we need to login PostGreSQL:
psql hazy_demo.
Then, we can run the following SQL query:
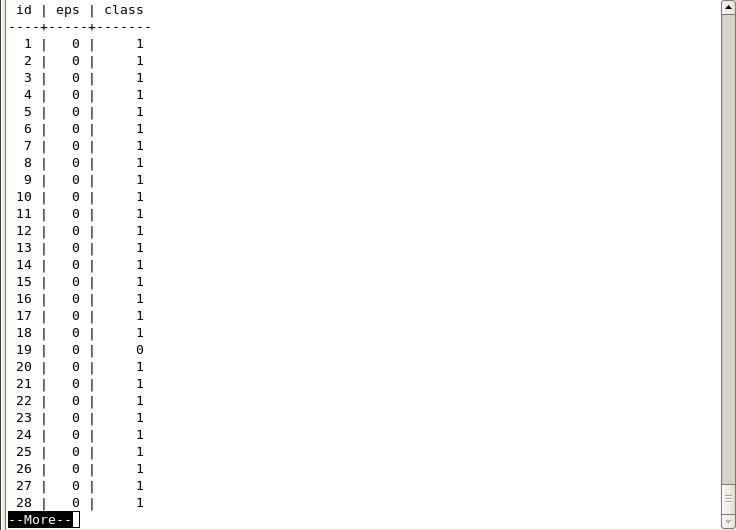
hazy_demo=# select id, class from demo_labeled_papers limit 10;
Output is shown in the following screenshot:
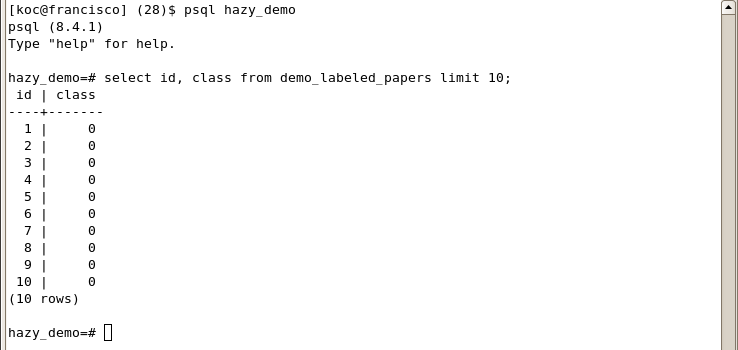
As we did not provide any training example, the SVM model initially classifies every entity as non-database paper (class is 0).
We can provide training examples to have more successful classification results. For example, when we query demo_papers, we see that the paper with id = 7 is a database papers.
hazy_demo=# select * from demo_papers where id = 7;
 id |                      name
----+------------------------------------------------
  7 | Query Processing in Spatial Network Databases.
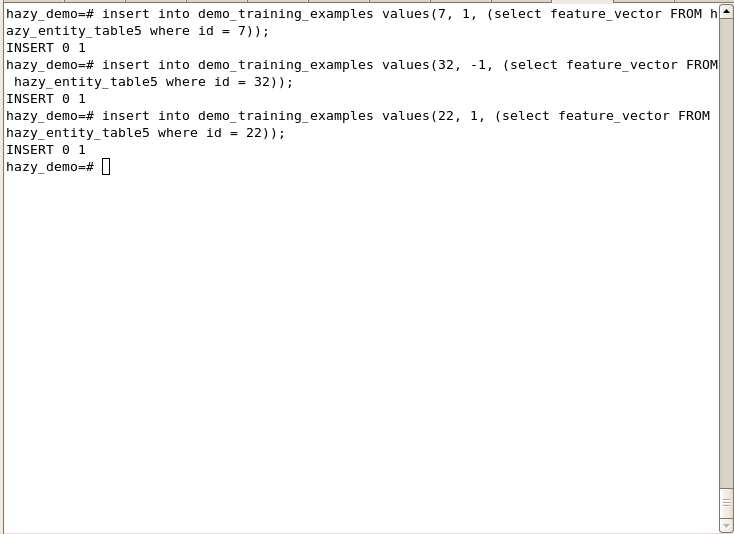
We can label this paper. To do that, we need to insert this paper to demo_training_examples as positive example(label = 1). However, we need to have its feature vector since demo_training_examples requires feature vector. One of hazy's internal tables (hazy_entity_table5) contains all feature vectors. Note that, 5 at the end of hazy_entity_table is id of our view. In order to insert this training example, we run the following SQL query:
hazy_demo=# insert into demo_training_examples values(7, 1, (select feature_vector FROM hazy_entity_table5 where id = 7));
We can give more training examples.
hazy_demo=# insert into demo_training_examples values(32, -1, (select feature_vector FROM hazy_entity_table5 where id = 32));

hazy_demo=# insert into demo_training_examples values(22, 1, (select feature_vector FROM hazy_entity_table5 where id = 22));
Now, when we re-query the view, we see that the classes of the examples change:
hazy_demo=# select * from demo_labeled_papers;